|
This section contains 439 words (approx. 2 pages at 400 words per page) |

|
A Darkness at Sethanon Summary & Study Guide Description
A Darkness at Sethanon Summary & Study Guide includes comprehensive information and analysis to help you understand the book. This study guide contains the following sections:
This detailed literature summary also contains Topics for Discussion and a Free Quiz on A Darkness at Sethanon by Raymond E. Feist.
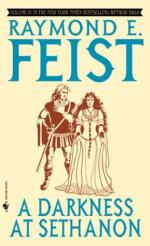
A Darkness At Sethanon is the final book in the Riftwar Saga. Pug and Thomas must stop Marmandamus from resurrecting the long-gone Valheru who will destroy Midkemia as they know it.
Prince Arutha has faked his own assassination in an attempt to get closer to Murmandamus to kill the leader of those that threaten the existence of Midkemia. While in route they find themselves captured by a group of people that are controlled by Arutha's foe, his cousin Guy du Bas-Trya. He doesn't trust Guy but they must overcome their differences to survive the attacks of Murmandamus. After several days of battling and thousands of the men and women in the city dead, they burn the city to the ground and make their way to Sethanon.
Pug and Thomas meanwhile are on a quest to find an Oracle, who when they find the Oracle, tells them in order to defeat the Enemy they will need to find Marcos the Black. They had thought that the sorcerer was dead and set out on a quest to find what has happened to him. Once at Marcos' home Island they find a piece of paper that he hid for Pug, telling Pug to look for Marcos in the Hall of the Dead. When they get to the Hall of the Dead Macros isn't there, so they must go to the outermost edges of time and space to find Marcos. Once they find him they realize that his powers have been stripped, but he still holds the information that Pug will need to save his home. They escape the traps the Enemy left, and Thomas is led to memories of his Valheru past that explain what the Enemy is and what they will need to destroy it. They are able to send word to the other Magicians telling them to get to Sethanon with an army.
When they arrive they find the city being overtaken and quickly go below the city to the Lifestone. The Lifestone has the power to bring back the Valheru, which were banished and became the Enemy. Thomas defeats the Valheru; Pug and Macros weave spells to protect them all while Arutha battles Murmandamus. Each plays a specific part of saving their world. When it is done they have kept the rift from being reopened and saved countless lives in the universe. They are able to drive what is left of the army back away from the city. Macros wanders off, fading into nothingness, leaving Pug and Thomas to wonder what will become of him. They have succeeded, and their world is safe once again.
Read more from the Study Guide
|
This section contains 439 words (approx. 2 pages at 400 words per page) |

|


