The earlier movements of the attack on June 11 were in the nature of a reconnaissance in force, as it was uncertain how far to the north and south the Boer front extended. The usual tactics were adopted. French with the 1st and 4th Cavalry Brigades under Porter and Dickson was to work round the enemy’s right flank and to endeavour to circle round it to the railway; a demonstrating attack on the centre would be made by Pole-Carew; while Ian Hamilton acted against the left flank.
French approached the Kameelfontein valley and won a footing on Boekenhontskloof ridge, which the Boers were only now moving out to occupy, with his left. His right soon came under heavy fire from Krokodil Spruit Hill on the Kameelfontein ridge, but he succeeded in seizing Louwbaken, which he held tenaciously in spite of Delarey’s attempts to work round it and of the shells of a heavy gun posted six miles away near Edendale. Meanwhile his left had been struggling for several hours on the Boekenhoutskloof ridge, which it eventually cleared, and was then able to support the right, which was still clinging desperately to Louwbaken. Throughout the afternoon the Boers continued their attacks on French, but were unable to shift him. At nightfall he found that instead of turning the enemy’s right, he had only plastered himself against it. He had already reported the situation to Lord Roberts, who authorized him to withdraw if necessary, at the same time cautioning him “not to risk too many casualties.”
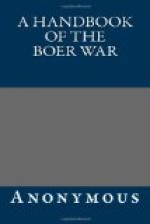
[Illustration: Diamond Hill.]
Pole-Carew, in the centre, was in action with his heavy guns only, “demonstrating” according to the rules, pending the development of the flank attacks.
The force on the right under Ian Hamilton was strong in mounted troops. He entered the arena through Zwavelpoort, and thrust at the bristling but indeterminate left flank of the enemy. The 2nd Cavalry Brigade under Broadwood evicted a small body of Boers from Tygerpoort, and when the 3rd Brigade under Gordon came up to hold the position until the arrival of an infantry regiment, Broadwood advanced across the valley in the direction of Mors Kop, and soon was not only under shell fire from Diamond Hill, but also under rifle fire from some vague detachments of Boers on his right rear.
Nor was this all, for as he proceeded, the enemy was seen pouncing down from Diamond Hill on to the Kleinfontein ridge upon the line of his advance, and simultaneously he was fired on from the right. Two horse artillery guns, which had been sent out, with an insufficient escort, to deal with the swoop, were almost captured, and were only saved by Lord Airlie at the cost of his own life. The attack on the right was soon checked, but the cavalry instead of outflanking the enemy was itself outflanked and unable to make a further advance.
Gordon had now come away from Tygerpoort, and, in touch with Broadwood, screened the right flank of Ian Hamilton’s infantry attack; which after the failure to turn the enemy’s left flank, had necessarily to be a frontal movement against the strongest section of his line. Bruce Hamilton, with a brigade of Ian Hamilton’s command, crossed Pienaar’s River near Boschkop and expelled the Boer advanced front from the Kleinfontein ridge. Ian Hamilton was now face to face with Diamond Hill, but the afternoon was too far spent for further action.


