PLANT JARDINIERE
The measurements are easy since the scale is one-half inch. That is, as you measure the line in the working plan you allow one whole inch for every one-half inch you measure on that. So, if a line measures three and one-half inches, make the line for your box seven inches. This is the real height of the box. Notice some lines have their real measures given at the side.
Directions for making are as follows:
Fold a piece of paper large enough for one of the sides and sketch one-half the outline on one of the folds. Cut to line and then draw the other half. This will give perfect balance. Cut two pieces of wood from this pattern by placing it on the wood and tracing.
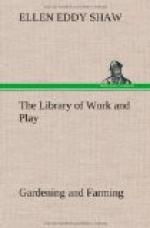
[Illustration: From the ruler you can read off the exact size of the jardiniere]
Draw a line parallel to each side 3/8 inch in on the pattern for a new pattern for the other two sides. These sides will need to be 3/4 inch narrower, 3/8 inch on each side, as they must fit between the other two sides. If wood of different thickness is used it will be double the thickness.
Use a coping saw to cut out the base. The tapering sides may be cut to lines by saw, plane or chisel. The curve at the base may be bored by 1/2-inch auger, and in this way a better curve may be had.
[Illustration: Helena used a scale of 1/2 inch in the construction of this jardiniere So the plan is very easy to work from]
Use 1-1/4-inch brads or finishing nails. A little glue added will make a firmer box. A much larger box after the same pattern will make a beautiful holder for a larger plant or shrub, using, of course, thicker wood.
Two small cleats should be nailed and glued from the inside to support a bottom. The bottom will give better service if it does not entirely fill the space. Let it be the proper length but allow a space of an inch on both sides for dirt and leaves to fall through and out.
Chestnut was the wood Helena used. It was stained and later waxed and polished. A beautiful permanent brown stain may be had on chestnut or white oak by applying strong ammonia to it with a brush and later sandpapering down and waxing. White wood is another good wood to use, but a stain will have to be applied to white wood, as ammonia will not act on it. A strong solution of permanganate of potash put on with a brush will darken any wood; it has no fumes.
VII
IMPROVING THE SCHOOL GROUNDS
During the first days of early spring The Chief and his boy assistants looked over the school grounds to see what should be done for its improvement.
The school was situated on a triangular piece of land right in the fork of two roads. The land was elevated; so much so that the building stood on a real slope; it was practically a road bank. This slope was washed by spring rains leaving large rocks exposed to view. The country road was especially poor at this section. There were deep gullies in it; the gutters were full of leaves and rock. About the school building was a comparatively level spot covered with rock. No trees grew here; a little grass struggled up each year, soon to lose heart and die.


